Configure Ultra+
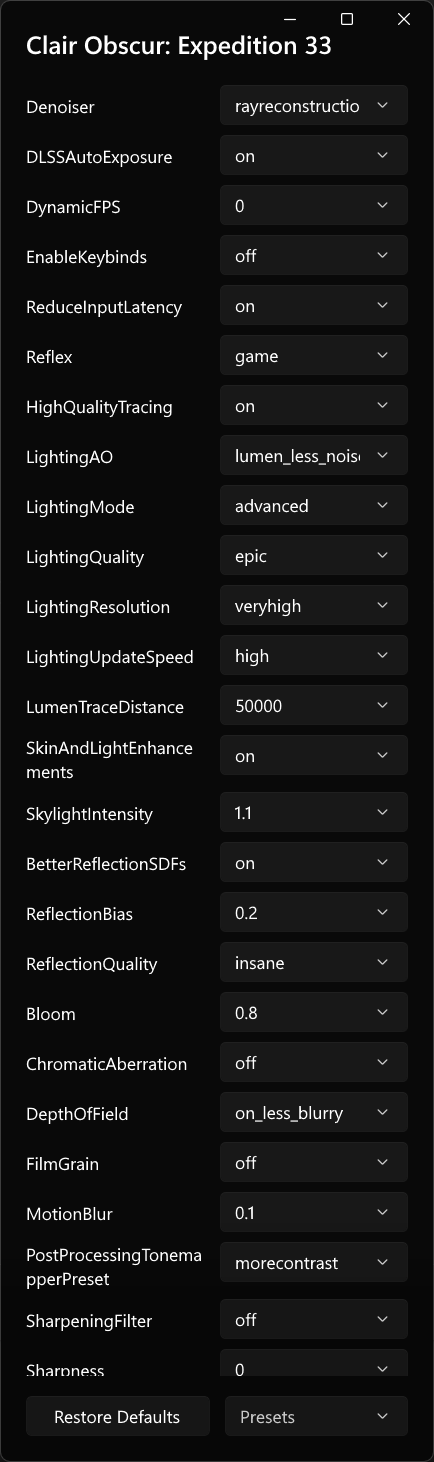
Use Ultra+ Manager (UPM) to change presets and settings. This page explains the configuration workflow, not every individual option. For option explanations and game-specific guidance, visit your game’s guide.
New to Ultra+? Start with Quick Start for installing UPM and setting up your first game.
Applying changes
- Open UPM and select your game
- Adjust settings in the game view, or use the presets described below
- If the game is running, press F12 in-game to reload the configuration, unless AutoApplyConfig is active
Saved settings load when the game starts. You do not need to launch the game through UPM or keep UPM running for those settings to load.
Most settings can be applied without restarting. A few require a game restart; this is noted in the setting’s description. For those settings, restart the game rather than relying on F12 or AutoApplyConfig.
Where supported, AutoApplyConfig applies configuration changes automatically once it is active. Enable it before launching the game, or enable it while playing and press F12 to load that change. Simply switching it on in UPM while the game is running does not activate it until the configuration is reloaded.
Using presets
Quality presets are included with the mod at install time. Start with the recommended baseline, then optionally apply a quality preset on top.
Setup Wizard
- Click Setup Wizard in UPM’s game view
- On the Presets tab, leave Apply Ultra+ defaults (recommended) enabled
- Select a quality preset, or leave None selected to keep just the baseline
- Optionally select additional presets; they apply after the quality preset, in the order shown
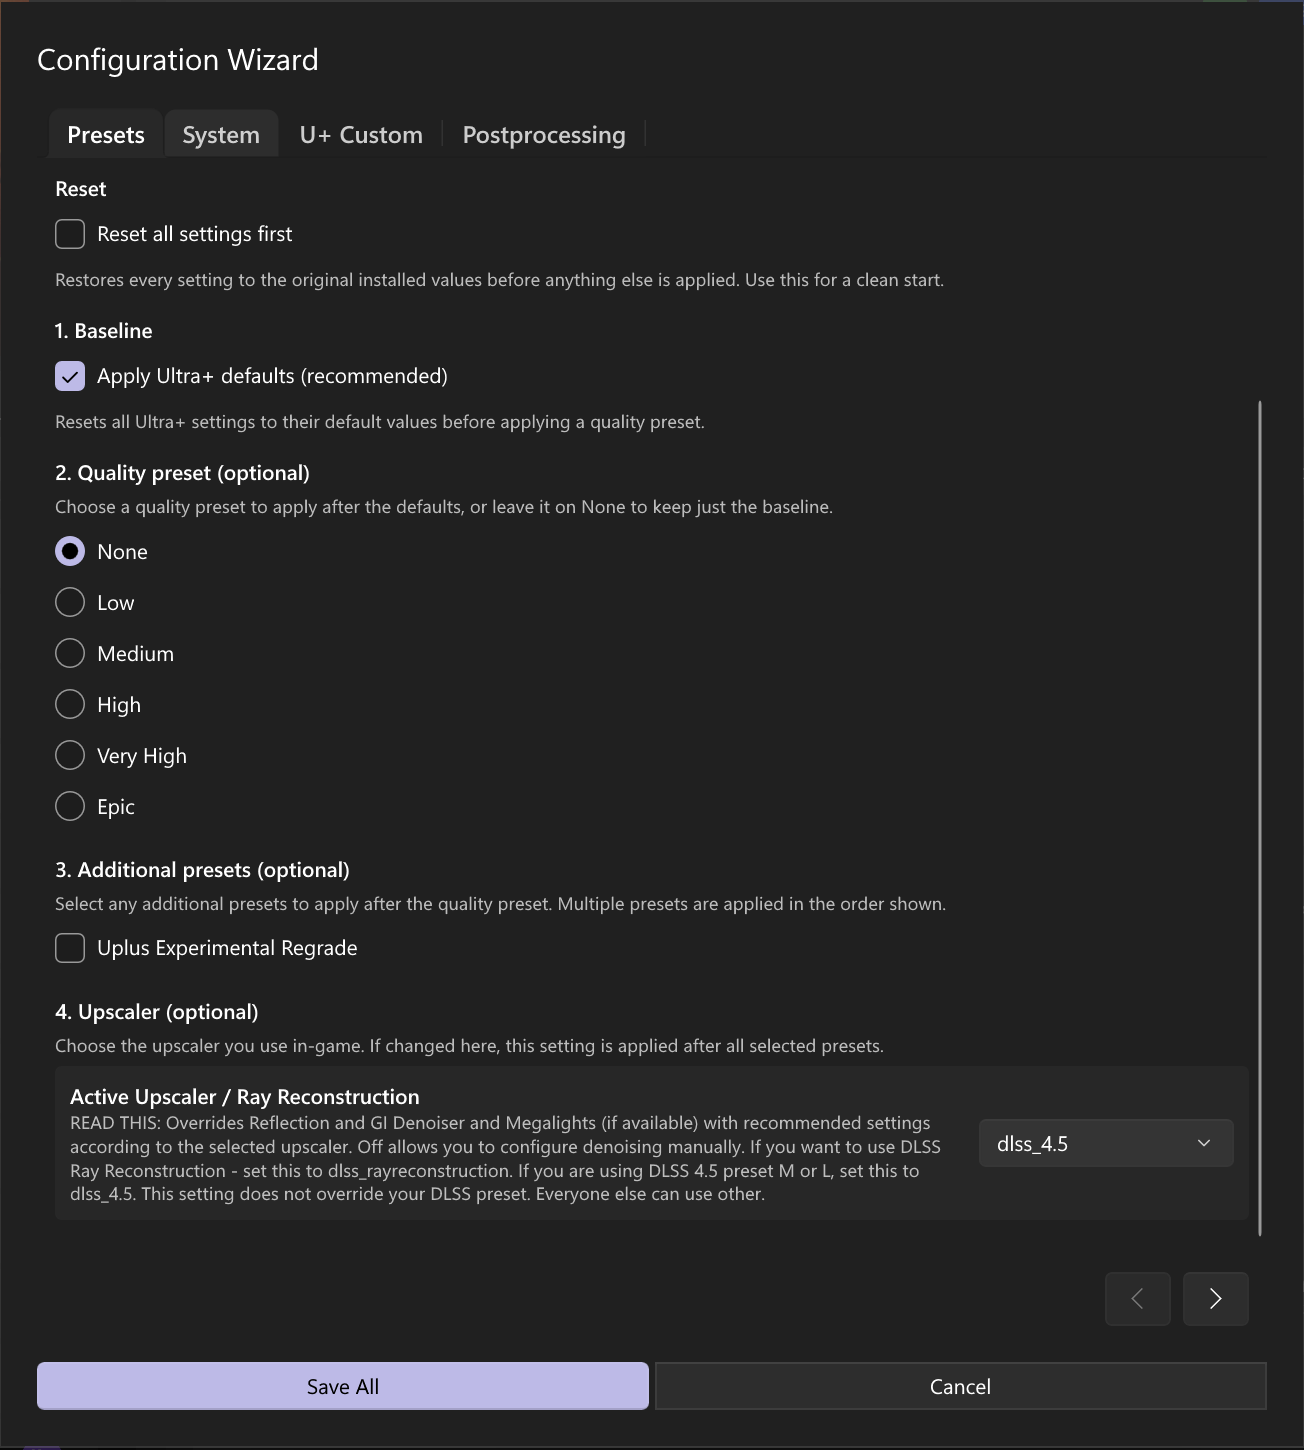
- Scroll down to the optional Active Upscaler / Ray Reconstruction selection and choose the option matching what you use in-game
- Review any other wizard settings you want to change, then click Save All
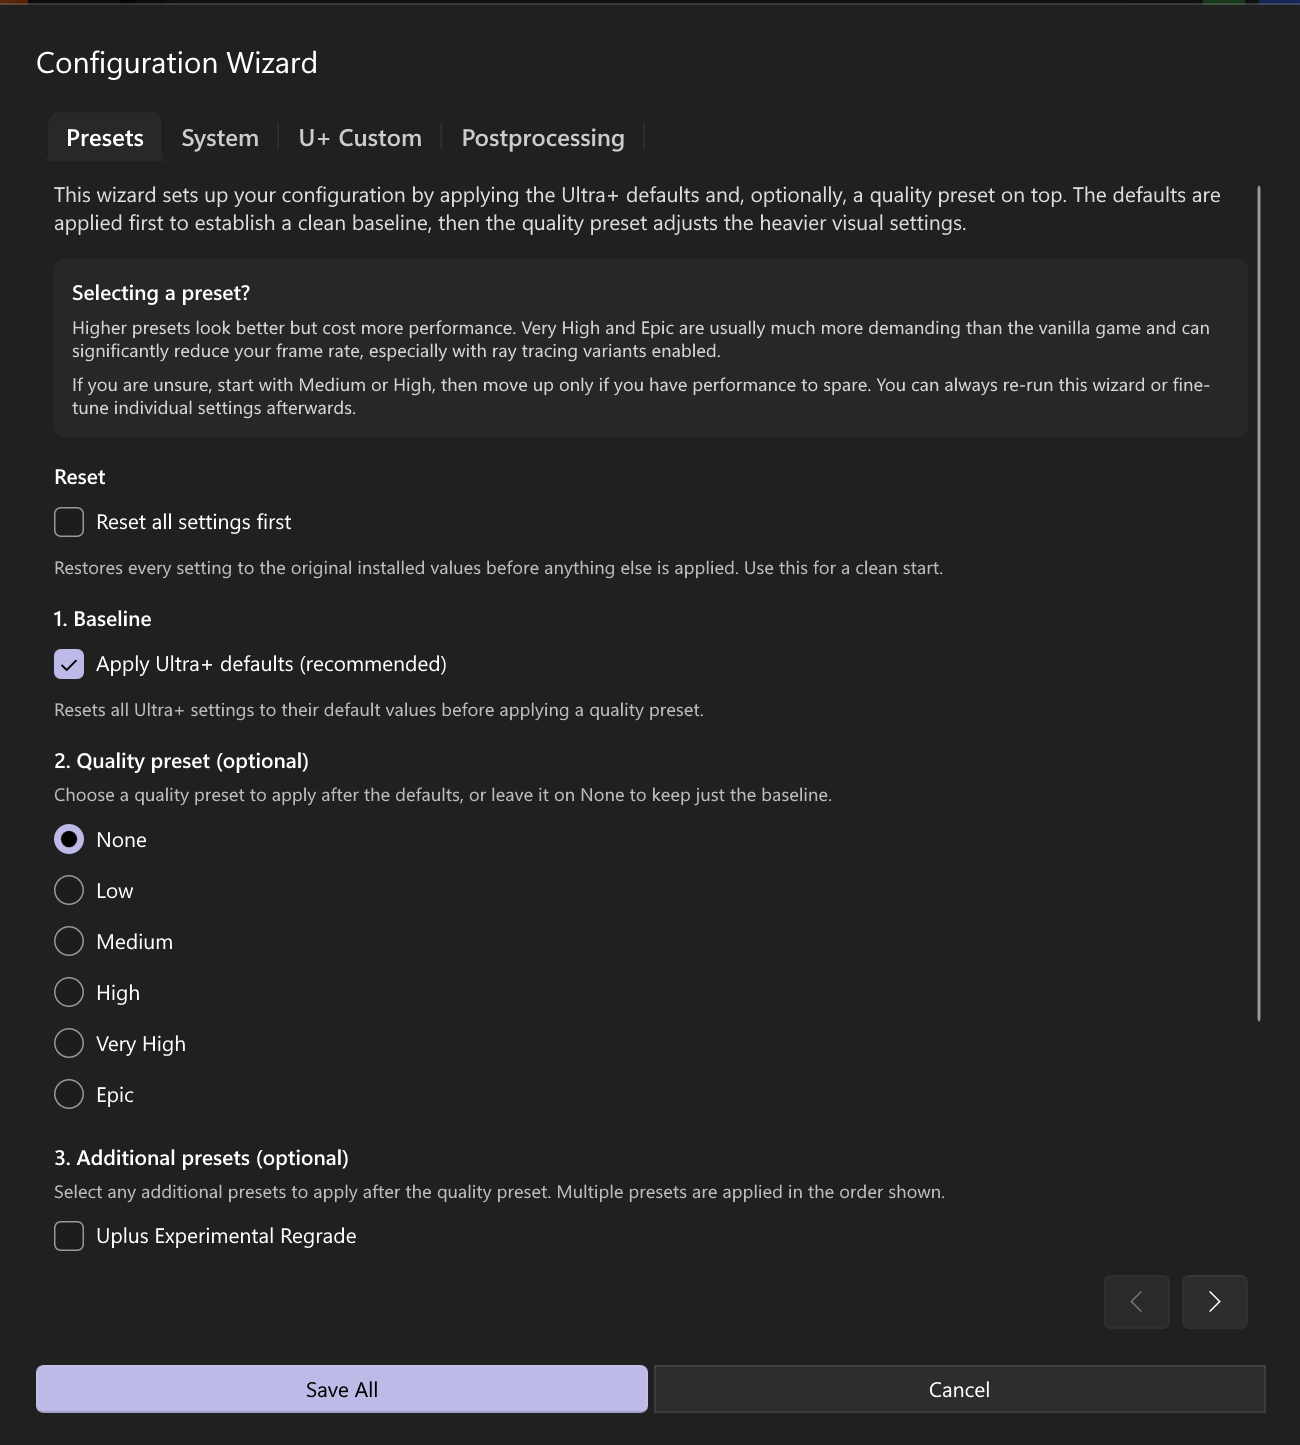
Reset all settings first is an optional clean-start action: it restores settings to their original installed values before applying your selections. It is not the in-game vanilla-comparison toggle described below.
The Active Upscaler / Ray Reconstruction choice applies recommended reflection and global illumination (GI) denoising settings, and Megalights settings where available. If changed in the wizard, it is applied after the selected presets. It does not override your DLSS preset. Read the setting’s description to choose the appropriate option; off leaves denoising configuration to you.
Preset dropdown
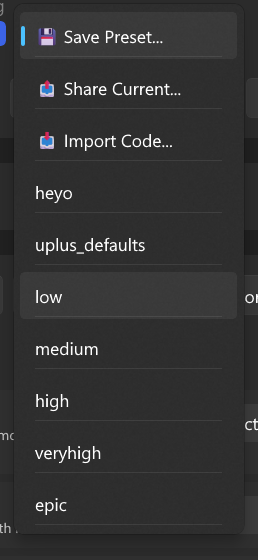
Apply uplus_recommended from the preset dropdown, then apply your preferred quality preset. If the game is running, follow Applying changes to load the configuration.
Saving and restoring your own presets
- Choose Save Preset… from the preset dropdown to capture all settings, not just your changes
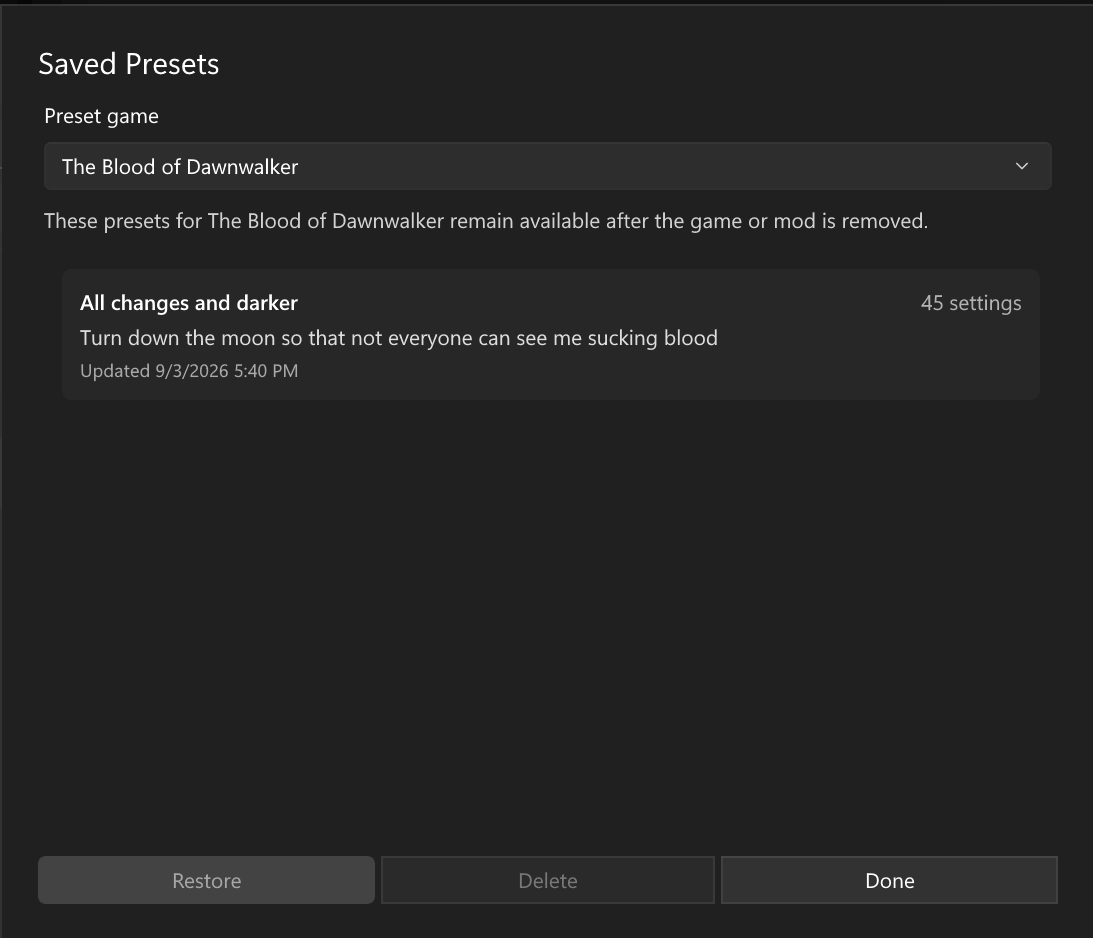
- Open Saved Preset Library… and select the relevant game to find your saved presets. They remain available even after the game or mod is removed
- Select a saved preset and click Restore to apply it immediately in UPM
If the game is running, follow Applying changes to load the restored settings in-game. Settings marked as requiring a restart still need one.
Sharing and importing presets
Use UPM’s Share button to export a preset code. To import a shared preset, copy its code, choose Import Code… from the preset dropdown, and enter the code. This imports a full preset, not just a list of changed settings.
Choosing a quality preset
The tiers are low, medium, high, veryhigh, and epic. They range from low’s focus on optimizations without sacrificing visual fidelity to epic’s focus on fidelity at the expense of performance.
These presets are not direct equivalents of the game’s own quality presets. Some settings overlap with in-game options, while others adjust features the game does not expose. Epic values are generally above what the game offers. Use your game’s guide for individual option explanations.
Using the overlay
- Open UPM’s overlay with Ctrl + Shift + F11 by default
- The game must be in borderless windowed mode for the overlay to work
- With AutoApplyConfig active, supported mods apply settings and preset changes live. Otherwise, use your reload keybind after making changes
Keybinds Configuration
UPM provides full keybind configuration for supported games.
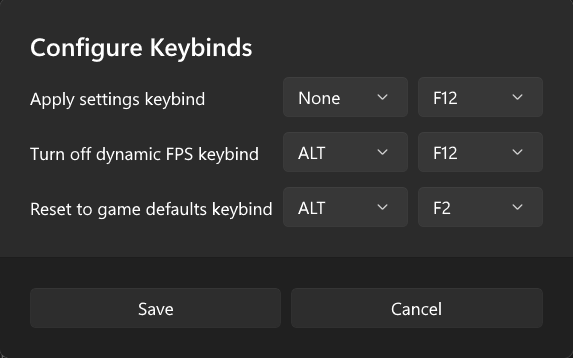
The keybinds.ini file allows you to configure the global keybinds used by Ultra+ Extensions.
Configuration Format
[GlobalKeybinds]
; Apply settings keybind
ApplySettings=F12

; Toggle vanilla comparison
ResetToGameDefaults=ALT+F2
Default Keybinds
- F12: Apply current settings
- Alt+F2: Toggle comparison with the vanilla game configuration. An FPS counter in the top-right corner indicates vanilla mode. Press Alt+F2 again to restore your prior mod settings
Manual configuration editing
UPM is recommended because it manages configuration files for you. If you need to edit manually:
- Find
UltraPlusConfig.iniatue4ss/Mods/UltraPlusExtensions/scripts/config/UltraPlusConfig.ini, relative to your UE4SS installation location - Open it in a text editor and change the relevant setting’s value after
= - Save the file and follow Applying changes
Consult your game’s guide for option guidance and Manual Install for installation paths.
Custom Engine Variables
You can add custom engine variables that will be applied after all Ultra+ settings:
- Create a file named
CustomSettings.iniin theue4ss/Mods/UltraPlusExtensions/scripts/configdirectory - Add your custom variables in the following format:
[custom]
r.Shadow.MaxResolution=8192
r.YourCustomVariable=value
These settings will override any conflicting Ultra+ settings and apply last in the loading order.